Monday, November 4, 2013

A little bit of Old in the New

While building a new house this last winter, my wife and I decided to include some cool antique's we had been collecting in the design. My favorite peace was a 1907 Swedish American Telephone Company "Hercules" wooden wall phone that I picked up at a resale shop for $30. It was missing the generator and the cap on the end of the earpiece but for the price it was a steal. After a little Ebay luck I found a original generator and a time appropriate earpiece and installed those. I decided I couldn't just have it on the wall, it had to do something.... how about a doorbell?


I wired in some speaker wire directly to the ringer and connected this to my original doorbell wires.


The 24vac doorbell transformer wouldn't work for this application so I had to enlist the services of a Tellabs 9101 ringing voltage generator to supply the 90vac 30 Hz.


Here is a video of it in action


Wednesday, January 2, 2013

1-Wire EEPROM devices

     Last time we introduced you to 1-wire devices and showed you how I made a generic device reader. In this post we are going to use my adapter to read some 1-wire chips and get into another of my hobbies, Motorola radios. Remember that unique ID on each 1-wire device I told you about? We will see that as well.

Here is are first target, a >$200 usb cable for a Motorola Astro25 series portable. Nothing in this cable is worth >$200, not even close. Here's whats inside


First thing we need to do is download and install a program called OneWireViewer if you don't already have it. OneWireViewer
Install this and connect you onewire reader, start it up and if needed set your adapter as the default 1-wire device.


You should have something like this
The first device under the device list is the unique ID of the adapter you are using.


 I pulled up the detailed service manual for one of the radio's that uses this cable and found the pinout of the mating side connecter. I then found the 1-wire data pin and ground and connected up mode homebrew adapter.


Almost immediately I now see an additional device in the device list. This is the unique ID of the 1-wire chip in my cable.


This view shows some data about our device and clicking on the memory tab shows us the memory contents. Selecting main memory will show us what we need, the scratchpad is used for moving data to the device before committing it to memory.


 Looks like only page 0 is used in this chip, if I highlight the contents of each line and use Ctrl-C to copy them to the clipboard I can paste them into Hex Workshop (HW from now on) to see what we have. After opening HW, create a new blank file and use paste special to paste the data into the new file, making sure "interpret as a hexadecimal string" is checked.


 and we have


This makes a little more sense, USB1.... is the data we are looking for, this is what tells the radio we have this expensive cable attached to it. Some further reading into the service manual reveals that when the cable is attached and connected to the PC the +5v from the USB port is connected to a transistor that is then turned on to ground the CTS pin which tells the radio micro-controller to read the 1-wire pin. If it see's this data then it configures the pins for USB operation and your pc see's the radio as a USB device. Here is a basic schematic, I'm not going into exact details, but there is more than enough data here to make your own cable. If any one uses this to make cables and sell them I only ask that you donate a percent to the p25.ca server fund to help pay the bills.


Tuesday, December 11, 2012

1-Wire device introduction

     1-wire or One Wire is a device communications bus system using a single wire for data and second for earth/ground/return for a total of 2 wires in reality. The technology was developed by Dallas Semiconductor (now Maxim) and all sorts of devices are available from temperature reading devices to eeprom's. Each device is created with a unique serial number or device ID in addition to its other capabilities. For this reason they are showing up as device security devices with this unique ID being an encryption key or hashed with data to provide security.

     There are many different packages that 1-wire devices are available in, from standard TO-92 and SOIC packages to i-button devices. No matter the package they come in they can all be accessed through the same 1-wire adapters (some hardware hacking required) because they all use the same 1-wire protocol. Here are some examples of the devices I have encountered.

DS2433 4kb EEPROM in a TO-92 package

DS1904 iButton

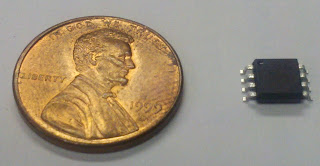
DS2433 4kb EEPROM in a SOIC package 
      I happened to have a few extra DS9490B USB to 1-wire readers handy but I didn't have anything to read the SOIC or TO-92 package chips so time to improvise.


I started with a standard off the shelf DS9490B USB adapter

Removed the cap and iButton and soldered two wires to the internal contacts of the iButton reader, one to the large copper contact on the board for the data line and one to the large ground shield that holds the button in place.


I then added some alligator clips to the wires. In the future I think some smaller ones would be easier to use, but I had these lying around so they will do for now.


Next post we will put our newly hacked device to use...